
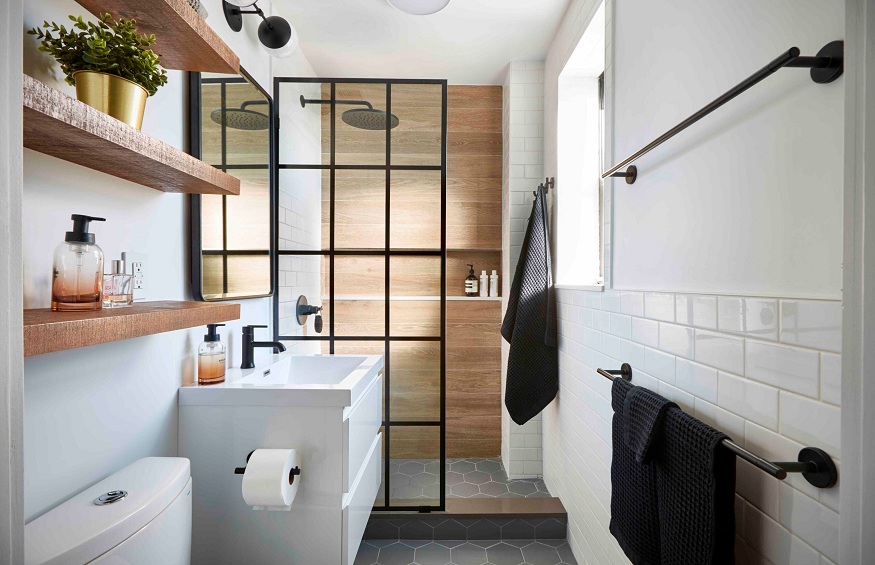
Much appreciated for its aesthetics, elegant design and comfort of use, the walk-in shower has become a trend in recent years. Ideal for furnishing a modern bathroom, it is most of the time made of tiling. The budget to devote to the work being quite expensive, it may be more interesting to lay the tiles yourself. To carry out the project, follow our guide.
What are the specifics of the installation?
As you know, a walk-in shower is a walk-in shower, that is, it is at the same level as the floor. It must nevertheless be slightly inclined to allow the evacuation of waste water towards the siphon. This installation is generally distinguished by the absence of steps, which contributes to its aesthetics while facilitating accessibility for people with reduced mobility.
Most people think that the installation must necessarily be at the same height as the floor, however, this is not always possible. This is particularly the case in tiles in a walk-in shower the context of an apartment renovation that does not have a crawl space. Therefore, you will have to take a short walk to associate the levels. Of course, this does not prevent obtaining a rendering like a walk-in shower, from the moment you unify the floor of the bathroom and that of the shower.
Choose the right tile before laying
For the coating of a walk-in shower, several solutions can be considered (mosaic, concrete, natural stone, etc.), but tiling remains the best option. In addition to being easy to maintain, the tiles are also simple to lay and adapt to all budgets. On the aesthetic side, you will be spoiled for choice between the patterns, colors and finishes offered by the manufacturers.
Beyond the style, it is important to choose your tiles taking into account safety. To do this, consider opting for class C tiles, with a PEI standard and non-slip properties. You can also turn to tiles classified according to the UPEC standard with the following indices: U2, P2, E3 and C1.
Know the drainage system of your Italian shower
Be aware that there are different drainage systems for a shower. In plumbing, they are called siphons. Most often, we find the classic square traps which are located in the center of the width of the shower, slightly off-center towards the bottom of the tray. In this way, the water drains in the middle of the shower, but still stays away from the entrance.
Today, it is possible to opt for shower drains. This is a stainless steel slider that will collect the water on the entire drop of the shower tray. When you make your walk-in shower with a square siphon fitted with a central bomb, it is preferable to lay small tiles so that you can follow the slopes and accompany the water in the shower.
Note, however, that small tiles can create certain constraints in terms of maintenance, because there are many joints between the mosaic tiles.
What preparations should be considered?
To begin work, you will first need to prepare the surface to be tiled. Generally in the context of such a project, specialists recommend starting with the floor before the walls. At ground level, the surface to be worked on must be ready: take into account the slight slope, lay the trays or create a concrete screed with a waterproofing film, etc.
At the level of the walls, whether they are made of cement or plaster, the filling of holes and cracks with plaster will be essential. You will then need to sand and wash to get a completely flat surface. Most of the time, when it comes to renovations, the bathroom is often already tiled.
But then, should you remove the old coating or just lay the new tiles on top? In reality, both options are suitable since neither affects the durability of the installation. However, if you decide to cover old tiles, consider replacing broken tiles and regluing any that are loose.
What are the steps for tiling?
Once everything is in place, you can start laying the floor tiles. The technique differs from the usual method, the tiles are not all at the same level. In this case, it is advisable to start in the middle of the shower and then expand towards the walls.
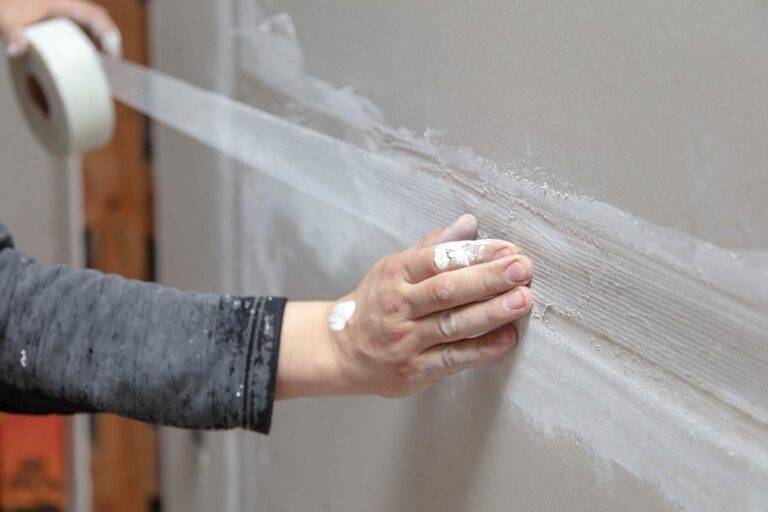
Laying the wall tiles is not more complicated, so it can be done by a skilled handyman. In order to obtain a more aesthetic rendering, it is better to align the joints of the walls and the floor. The last step is the realization of the joints. It requires a certain meticulousness since the latter guarantee the sealing of the tiling. The work is quite simple:


+ There are no comments
Add yours